It has been almost five months since we moved into our new bigger place and sorting our home out has more or less slowed down, however, I am still cracking my brains on new/better ways to store/display my things in my work room.

With my new work room, I had the chance to upgrade my desk size to a 160cm long Bekant from Ikea. It allows me to have a side for graphic design on my iMac and another side to accommodate desktop easel usage/weaving/entertaining friends during craft parties. It is quite an ample sized personal desk, so to say I have small desk space is an understatement. However, I only wanted to use a small part of my desk to store stationery, so I have been looking around.

I previously had acrylic pen/stationery holders from Muji and one of them is still on my desk but it looks haphazard. I also know I didn't want bulky drawers to store my incoming set of 60 coloured pencils. So with an open mind, I made a trip to Muji again to see what ideas I can find and indeed it didn't disappoint.


I chanced upon the Muji PP File Box series with coordinating Pen Pocket holders (those little compartments on the inside of my file box, and the larger one hanging outside). I found this system incredibly versatile because I can choose to hang stationery inside or outside the box.


Also because I bought a book on washi tape x coloured pencil art, I was also looking out for steel edged plastic rulers and was so stoked to find one at Muji! The author suggested getting a clear ruler with a steel edge so you can see where you are cutting.

I've also had the habit of keeping my journal, planner and sketchbook on the desk standing against the wall next to my desk so having a large holder to store those seems to click immediately.


So here is the 'storage caddy' in use at the very edge of my desk. I love how clean it looks and can't wait to have my new pencils sorted in as well, together with a pop up colour chart for easy reference. I didn't plan to have my multi liners there but found it's so much better having them displayed instead of kept hidden in a pencil case all but forgotten. Yes, this stage in my life I have been forgetting to use my drawing materials. :(

Before this trip to Muji I also visited Tokyu Hands to get ideas, but was so disappointed by their lack of stationery holders. :/ Stationery galore, but storage there was only some overpriced round tin can and a set of colourful wooden holders. However, I did come across the King Jim Masking Tape Case and got it to store incoming washi tapes for future projects. It looks like the below.


It is made of sturdy hard paper and opens and closes like a box with 4 'shelves' to store 60 washi tapes. I currently only have the first row filled but with the free agent fee promotion at Ezbuy I've ordered 35 more rolls because the prices were so low! Will share better photos of my storage and display soon!
Hi everyone, I've been wanting to share more information on the various types of frame looms out in the market so people who are new to weaving can understand their differences and how to get the weaving outcomes they want.

I may not explain all the basic terms enough assuming everyone knows the basic terms like warp and weft, so do feel free to Google them up or ask me in the comments section.

First up are these two styles of frame looms most popular around here:
The notched frame loom with heddle bar on the left commonly sold by Kaliko Co. and Funem Studio and the simpler loom with raddle segments/plastic teeth with pick up stick sold by Schacht Spindle and Louet.

THE NOTCHED LOOM
The notched loom was my first loom and I got a lap-sized one to try and here are some of its parts explained.

  • Adjustable Tension
    This loom has screws on the top and bottom notched bars to allow for adjustment of the warp tension which I find very useful over time, as the longer you leave your piece on the loom, the warp threads will slacken from the constant stretching. You can easily tighten or loosen your warp threads before, during and after your weaving!
  • Adjustable Length
    Another useful thing to note about these screws is, with the help of some table clamps, one is able to take one side of the notched bar as long as you want on a table and do an extended length of work longer than the loom itself. You can also work on this like a rigid heddle loom. See how Kalico Co did it!
  • Heddle Bar
    Another useful point is the heddle bar (that angled piece of wood with notches in the middle). It helps you separate the 'over' and 'under' warp threads for super easy tabby weaving. This item would relate much to the Rigid Heddle Loom's reeds, which are also much like the heddle bar, allowing easy separation of the alternate rows of warp threads for efficient weaving.

These looms are usually limited to a wide 7 epi/threads per inch, which is suitable for thicker weft yarns like worsted, rovings, bulky etc. If you want to weave with finer yarn, you may need to bundle up a few strands to form a thicker weft.

This is the tutorial I referred to on how to warp this type of loom. And it's a high density warp which I find keeps my weavings intact. I usually weave non shaggy pieces and tapestries on this loom as the gaps between the warp threads are larger.

THE SIMPLE LOOM
The simple loom was something I got after watching Allyson Rousseau's tutorials on the way she weaves and how she achieves tufted shapes. She showed how she made her looms using nails and canvas stretcher bars, which I also tried, but was not satisfied by my own imperfections (inaccurate spacing of nails, nails falling out etc.).

These looms allow for warping up to 11/12 epi, making the warp threads closer to each other and allowing for weaving with finer yarns and you can also preserve the warp ends to use as ready-made fringe. I initially didn't want to use this loom because it felt like a lot of work to weave tabby stitches without the help of a heddle bar. Below are some of its parts explained.

  • Pick up Stick
    You can choose to weave without this tool, as it acts like half of a heddle bar. It lets you pick up one alternate row of warp threads when standing only. When you weave the opposite direction, the shed stick needs to be flattened.
  • Raddle Segments/Plastic Teeth
    These allow for two different setts. You can use either a 6 or a 12 epi on the Schacht Lilli loom.  I have not experienced slackening of my warp threads on my Louet Extra Large Lisa loom so perhaps that's why there was no need for any adjustment mechanisms?

TYPES OF WARPING
Even within these two types of looms, there are various ways to warp your loom for either a low or high density warp, see how A Pretty Fix explains it.

As I weave more projects, I have found that each loom has its advantages over another based on the final piece you want to achieve. I'm still not that clear on how different they can be but will hope to find out as I weave some more. :)
20 Feb 2019

We welcomed the birth of our firstborn in May 2017 and I have since forgotten about this blog and what I had set out to do in terms of my art and crafts. Recently, I found a new craft that I love, which is weaving! Compared to painting, which had been a cause of stress in the past few months, I could still create colourful 'art' through weaving on a frame loom and touch them, too!

I would like to continue sharing this journey in fulfilling my destiny. May He reign in all I do, Amen!

Here's a picture of Ralph from November 2017, our little cherub. With his arrival, I have also delved into sewing baby drool bibs and pillows! That will come under a sub brand: Mihon & Co.


Paint organiser

Cotton labels arrived! Had to hand sew them onto the Painter's Organiser prototypes and share new pictures with you. This batch of labels didn't arrive the way I wanted (all edges sealed) so I have to FrayBlock raw edges to prevent fraying! Adding this to the handmade quality. ;)


Here's a look at the current two fabric offerings for the Painter's Organiser. I have black and dark red drill cotton variations waiting to be sewn up, but here's a look at my grey one with M Graham's name filled in with a 0.3 Copic Multiliner pigment ink that's water proof!

Waiting for my order of gold heart-shaped jewellery tags to arrive + many more materials for jewellery making! This year I'll do my best to go all out and create everything I ever thought of and put it all out there. Materials have been sitting around for ages without being utilised and I hope this year, they will be happily put together into beautiful and useful items.


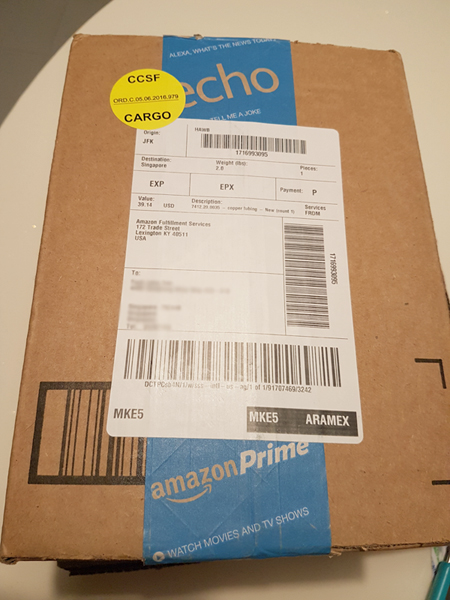
Here is shipment 1 of 2 of my Amazon M Graham oil paint order! I initially had just this set in my shopping cart but read elsewhere about other colours I ought to have as a starter palette so I added more paints into my cart (and I forgot and ordered a 150ml tube of Titanium White as well! Oops white overdose... Guess I can do more pastel works!)...


Here's the sturdy box my set came in. It was nicely padded. I ordered from the M Graham store on Amazon.


And a look at the front and back of the box in relation to my hand. I wonder when I'll be comfortable testing these paints out. D:
grey Painter's Organiser canvas pocket wall hang

Went fabric sourcing and picked up three other colours I was thinking of working on for various combinations. I am so in love with the above grey fabric! It's a beautiful middle weight cotton canvas made in Japan that feels expensive and not too stiff. <3 I went to get the brown leather strap to match this grey, too! Now to figure out whether I should paint the wooden dowel a champagne gold colour so it may look nicer? (psst, shipment one of my M Graham paint order arrived! Suuuper delicious set of 5 oil paint colours with little bottle of walnut oil and alkyd medium. <3 *hoards*)


The maroon red and black fabric in the picture above are thinner cotton canvas drill also from Japan. I wish I could find the other colours to the grey equivalent. ;__; It's perfection!


Above was a work in progress shot the night before. Such a beautiful fabric! It would make a wonderful tote bag, too! Let's hope the shop still stocks more of this fabric, though I heard there may not be much of it left. :(

Happy lunar new year to everyone! It's the 9th day of the Lunar New Year season of 15 days in total and here I am chugging at my sewing machine the night before so I could realise a creation I had been thinking about since Friday night. :) It was so bad I woke up at 6am and started drafting the design and sizes.

This all started when I recently decided to treat myself to an order of M Graham oil paints from Amazon. I was elated that they offered shipping to Singapore and orders are also eligible for free shipping. I know I am still a new learner in oils, but I was curious to see how better quality artist paints would differ from the student grade paints I'm currently using (see above picture showing my Winsor and Newton Winton oil paints).

I also read about the qualities of M Graham oil paints: they use walnut oils and their oil paints are all solvent free. So no toxic smells when used indoors. They also ranked pretty well amongst other artist quality paints and affordable. I was contemplating getting Gamblin artist oil paints (because amazing artist Cuong Nguyen recommended them in his oil painting ebook) but I would need to order them through an agent from US e-stores, which I found troublesome in the end.

*whispers* I was also so tempted to get M Graham's watercolours and gouache paints because they use HONEY in their formula... But alas, I need to first handle oils well before all else!

So then I started searching around on the Internet on how other people store their paints and found the wall hanging pocket organiser to be a perfect way for me to store these beautiful oil paints that are on their way to me! :D Seeing how I couldn't purchase anything ready made, I thought why not make one customised to my own wall space and collection?


I can't wait to embroider/write in Van Gogh's quote onto the brush holder pocket (or top of the organiser):
"The only time I feel alive is when I'm painting."

<3 So I've put this up as a listing on Etsy and I can customise it to fit YOUR wall space and collection. :D I think I'll need to go source for other types of fabric and colours and try out various combinations to show how customisable this Painter's Organiser can be! Thanks to this I went to grab a few more bottles of Martha Stewart's Metallic acrylic craft paints to paint the wooden dowel for more variations.

I imagine these could house various brands of paints for painters who love collecting. :B What a sweet way to house these lovely paints! I also learnt that storing them cap down is the best as oils tend to float and pigments sink to the bottom. So having them downwards leave the pigments right at the opening for richest paints and less runniness.